
Saturday, March 21, 2009
Living Naturally (and a wee bit obsessively) Through Food
I am obsessed with food.
Some people buy shoes with abandon. Others jump when they hear the words "sample sale". And still others know when new music is released and scoop up the tunes that same day.
Me? I prefer to spend my money on creamy organic yogurt, just-picked strawberries, and meat from a local farm.
Since I've become a parent, especially with one child allergic to milk, I have tried to live more naturally than I did in my days as a single workaholic. I've become much more aware of where our food comes from, how it's grown or raised and the best ways to prepare it so that it's more likely that my kids will eat it. I check the labels of everything to avoid the words "high-fructose corn syrup" and to try to limit the amount of sugar and salt in prepared foods.
Oh, and because money doesn't grow on trees (the last time I checked), I try to keep myself within a budget so that we have money for things like our mortgage and heat.
But, living naturally through food does not have to be as expensive as many think.
In a few months, I'll start my third year with a CSA (Community Supported Agriculture) and, once a week, will pick up my bounty from a local organic farm. I'll start off with greens before moving into the beans, peas, tomatoes and zucchini of high summer, only to end in the fall with more greens and winter squashes. Is it expensive? Well, yes and no---since I pay for the season upfront, there is one large check to write several months in advance of any produce. But, once the vegetables start rolling in, the cost seems reasonable. It just takes flexibility and a willingness to "eat with the season".
Another low-cost but highly satisfying way to get fresh, organic veggies is to start a container garden. I plant herbs in the big containers on my front steps--the one spot in my yard that gets great sunlight most of the day. There will be basil, thyme, parsley, cilantro, sage, rosemary, oregano, chives and even a few tomato plants for months.
Once a month from June to November, I drive to a farm to pick up 20 pounds of grass-fed beef and naturally raised chicken and pork. The meat is vacuum-sealed and frozen solid. The meat ranges from $7-$8 a pound, is locally and humanely raised, and teaches the kids a little about our food chain.
I buy my eggs from a friend. My children have even collected eggs from these chickens. The cost per dozen is more than what I'd pay for the cheapest eggs in the supermarket, but it's worth it when you taste the eggs.
Another idea is to pick strawberries, blueberries and then apples. The kids love to do this and, while we always pick more than we can eat, we freeze the extras for use in pies, breads and cakes later in the season. I've also planted my own blueberry, blackberry and raspberry bushes in the hopes of producing my own fruit some year.
In the future, I hope to learn how to can foods, make pickles and jams, bake bread from scratch and make my own pasta which should be both frugal and delicious ways to enjoy the food we eat. This means I may become even more obsessed with food, but, hey, it's cheaper than most of the other obsessions out there.
-------------------------------------------------
This post was written for Parent Bloggers Network to promote SC Johnson's new line of natural cleaners, Nature's Source. Nature's Source "combines simple, biodegradable, plant-based cleaners with the cleaning power of Windex and Scrubbing Bubbles, so you never have to choose between natural and effective cleaning."
Saturday, March 14, 2009
Things That Go Bump in the Night
I've always been reluctant to brag about my children's sleeping habits.
For one, we were the type of freaks that, when we got a good night's sleep, did so by either sleeping with three kids in our bed, or with either my husband or I sleeping in bed with a child (often rotating zombie-like between beds to keep everyone quiet). Not exactly everyone's idea of a "good night's sleep".
The other reason I've tried to keep my mouth shut is that the minute I speak the words, "the kids are sleeping SO WELL!", the sleep gods laugh cruelly and doom me to a night of horror. Seriously it never, ever fails.
I will go out on a limb right now and say (quietly, so the sleep gods do not hear) that the nights have improved a ton now that my youngest is four and is starting the night in his sister's room. About half of the time, I still wake up with him next to me by morning, but he knows to not wake me anymore when he sneaks under the covers and pushes my head off the pillow.
And, since he is the "baby" of the family, he gets away with this. If he gets too much bigger, I'll need to grow a spine and kick him out, but for now, I'm just thankful that he still likes sleeping cuddled next to his mama.
The girls, who are now 6 & 8 aren't as likely to try to sleep next to me, but my six year old still wakes up confused, stumbles into my bed and wriggles around like a worm on the end of a hook---turns out, she has to go to the bathroom, but for whatever reason, she needs me to wake up and tell her, "Go To The Bathroom".
And then there is my oldest, who will appear next to my bed and stand sphinx-like, breathing on my face until some part of my consciousness realizes she is there and wakes up. I don't know how this hasn't freaked me out enough to karate-chop her in the head, but she should thank her lucky stars I haven't spazzed out when I find her lurking over me in the dark.
Her reason for waking me is always the same: "I had a bad dream." I never dare to ask her what the dream was because then I hear a 10-minute, blow-by-blow account of some rambling, bizarre story that never sounds scary and never makes sense. Instead, I just give her a hug and send her on her way.
I don't handle these night wakings all that well, although they are infrequent enough to be bearable now. What I'm really dreading is when they are able to go out past midnight with friends, and I'm left home waiting up for them to come home. Then, I'll wish for the uncomplicated innocence of "I had a bad dream".
-----------------------------------------------------------------
Perhaps my kids are sleeping more soundly now that they have a Sylvania PalPODzzz to light their way to the bathroom and to offer a soft night light glow as they sleep.
This post was written for Parent Bloggers Network.
Monday, March 9, 2009
A Very Fairy Birthday Party
My middle daughter has always been a bit of a pixie, with her short blond hair, small stature and tendency to "flit" (aka, never sit still). So, when her sixth birthday came up on the horizon, we decided on a "fairy party", with the emphasis on the fairies that live outside among the flowers and trees, and not those found in skimpy costumes and found in the world of Disney.
I am by no means a trained party planner, but I love to find neat ideas online and to research things to the nth degree. I try not to spend "too much" although my record-keeping is a bit fuzzy. With that in mind, read on to see how I pulled this party together.
Invitations
I had confirmed the date and time of the party with all of the parents over a month in advance, which made me a bit lazy in getting printed invitations out on time.
After stalling a bit too long, I realized I had about one day to get invitations out before they'd be seriously late. Instead of going too crazy, I just printed this Fairy Photo Frame on photo paper and then cut out the picture.

I mounted the picture on white greeting card paper. In the center of the image, I wrote in marker, "You Are Invited. . ." Inside, the girls found the following text:
Wear you fairy best, a tutu will do.
Your wings & accessories await you.
The party is March 8th from 2-4,
please say you'll fly by.
The birthday fairy Jilly
Waits for your reply!
Your wings & accessories await you.
The party is March 8th from 2-4,
please say you'll fly by.
The birthday fairy Jilly
Waits for your reply!
Decorations
Most of the party took place in the dining room, so I concentrated my decorating to that room.
I covered the table in two light green cloth tablecloths from the Christmas Tree Shop. On top, I scattered some pink flowers we had left over from my oldest's luau party (from three years ago!), and threw some fake pink flowers in some vases (I would've preferred fresh, but I had the pink ones left over from one of the crafts).
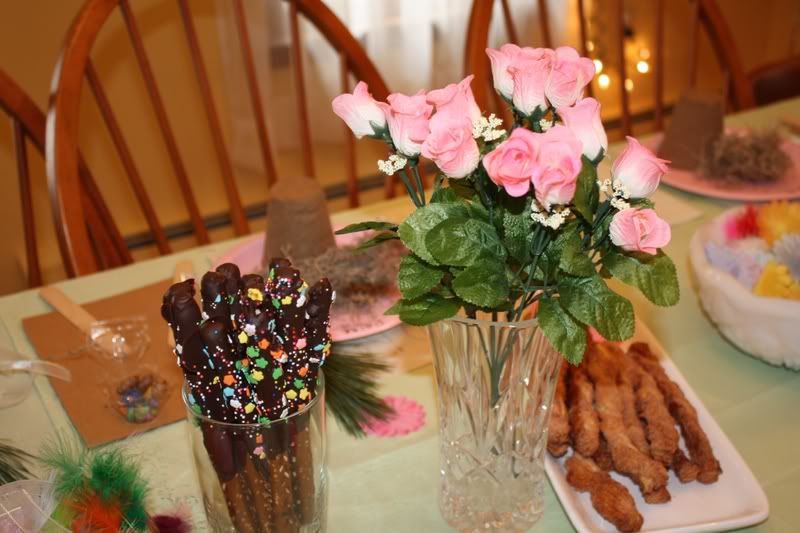
Two long strands of Christmas lights hung across the windows; I found the lights at a drugstore in January for 75% off. In one corner was the large mylar balloon bundle that my sister sends the kids every year for their birthday. She always tries to tie them into my party plans, so there was plenty of girlie pink.
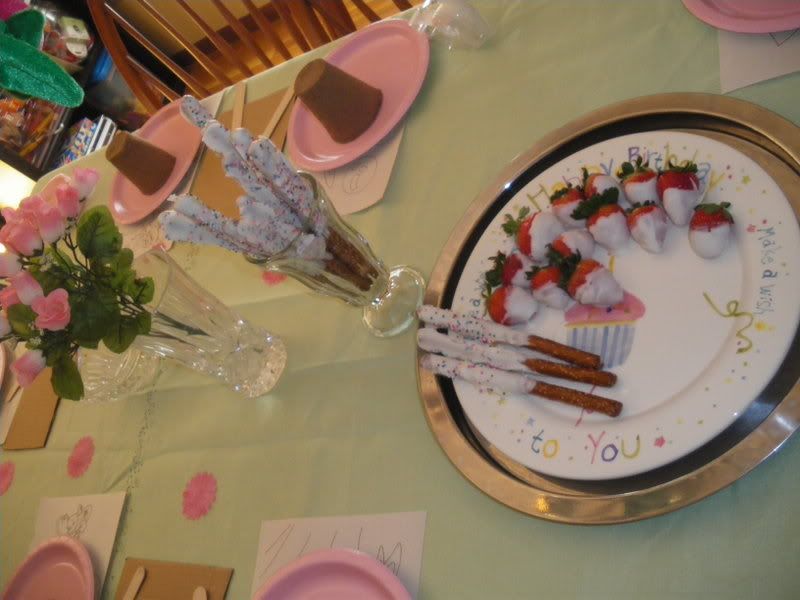
The food on this table was decidedly sweet: chocolate pretzel "wands", chocolate-covered strawberries and cookies.
Arrival
When the guests arrived, they were invited to the Family/TV room to choose a head piece. I was originally going to do these as a craft, but decided it was a bit too advanced for a few of the little girls and did them myself over a couple of nights. They were made of some dollar-store head bands, floral picks found in the wedding section of the craft store, green floral tape, some ribbon and a sparkly butterfly clip for each head piece. They were not hard to make, but just took a little time.
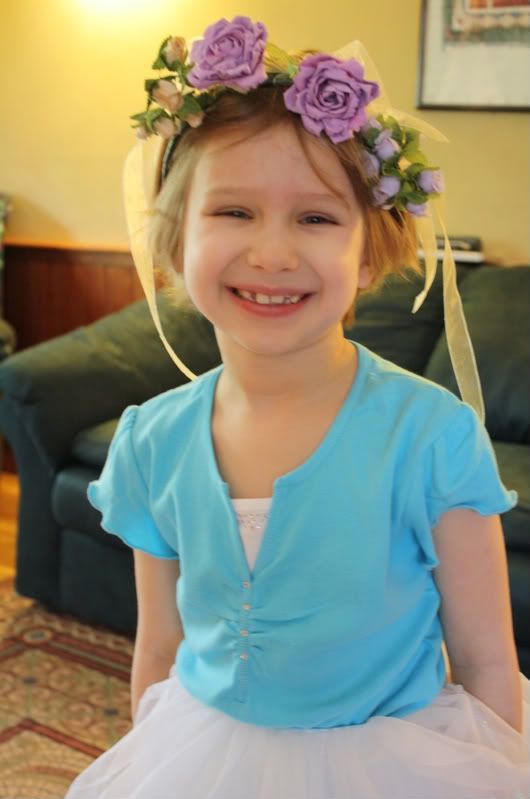
I had two boys at the party, and rather than make them wear flowers on their heads, I took some green felt, a stapler and a large feather and made them this elf hat. The ribbons were needed to keep the hat on their heads.
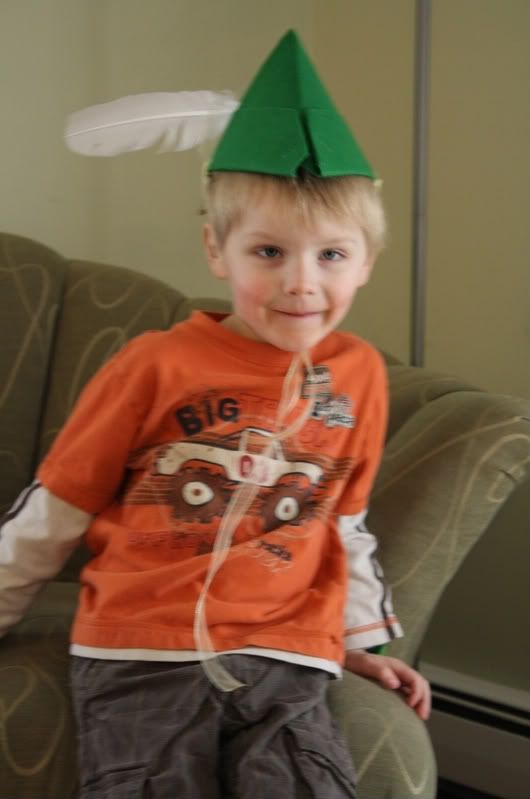
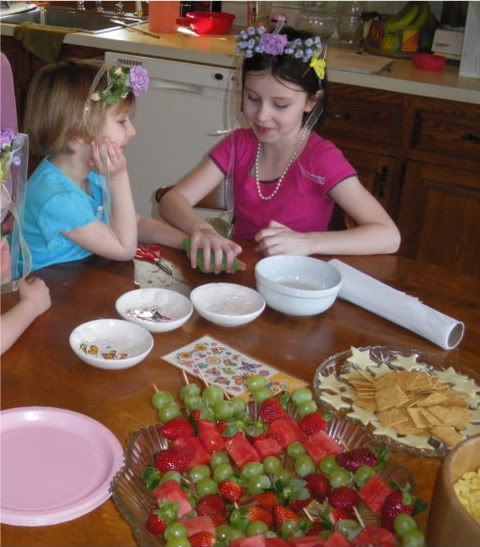
After getting their hats, the kids went into the kitchen to get a fairy tattoo. I had grabbed a couple of sheets that morning at Target for about $2 each. There were some snacks out on this table: fruit skewers, Tings and cheese stars (cut with a small cookie cutter that morning) and crackers (aka, the "healthy table").
Craft Time
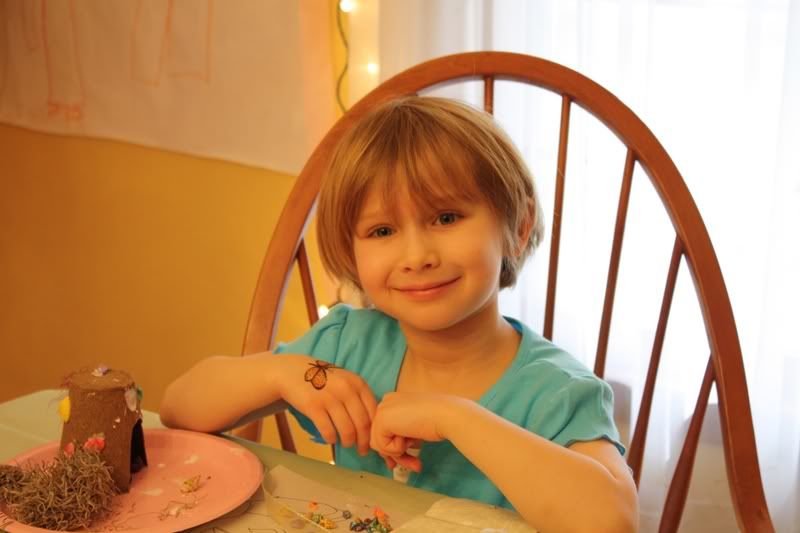
Once the guests had arrived, they went into the dining room to make their craft: Fairy Houses. I had fallen in love with this idea after seeing it on the Simply Lovely blog. I cut little holes into Peat Pots for doors, and put out some tiny colored shells, feathers, strips of ribbon and moss (all from craft store), as well as some tiny pinecones and pine needles collected from our yard. Glue was poured into an egg carton that had been separated into individual holders, and they used a popsicle stick to apply. They did their craft on pink paper plates to make it easy to bring home and to also protect the table a bit from over-enthusiastic glue application.
Scavenger Hunt
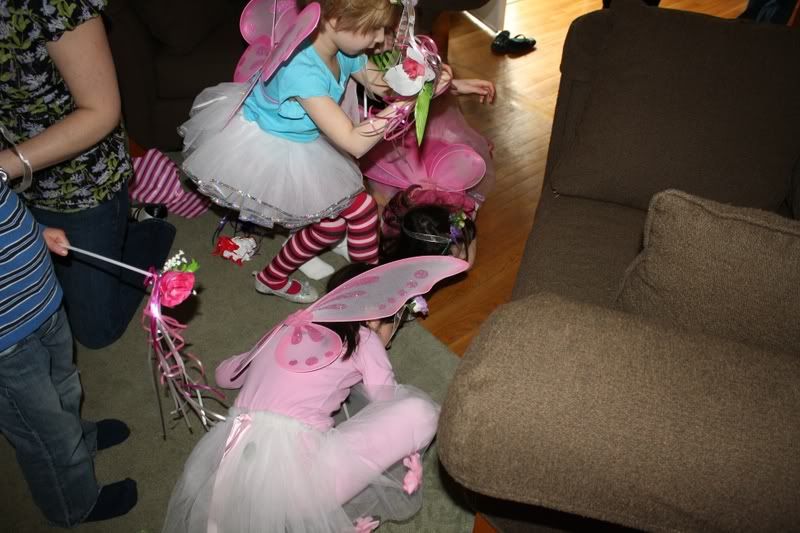
After the craft, I assembled all the kids into the Living Room to explain the scavenger hunt which is a variation on the idea I saw at Great Fun 4 Kids (see attached Word document at bottom). I took a small gift that I had bought for Jilly and wrapped it about 11 times (enough so each guest could unwrap one layer). At each layer was a new clue that told them where to go to find another gift to take home. Holding their empty favor bags, the kids ran around the house to find the things that would become their favors: little bottles of bubbles, candy, plastic butterflies, gel pens, etc. They also got found their wings and wands (found here) which made them "official fairies".
As a goof, I looked up their "Fairy Names" printed them on stickers and read them outloud at the end of the hunt---the boys received ridiculous "Elf Names". The stickers went onto the favor bags so no one could lose their bag.
Cake Time
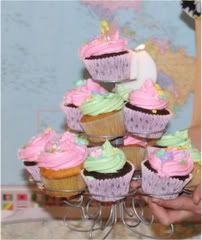
My oldest has a milk allergy, so I always make my own cakes and usually rely on cupcakes from my favorite cupcake book ever: Vegan Cupcakes Take Over the World. My inspiration for their "look" came from this photo. I purchased sugar flowers from Fancy Flours and, instead of Tinkerbell, grabbed one tiny fairy found at Target and stuck her to the top of the Cupcake Tower.
The cupcakes and Dibs ice cream (brilliant discovery because they are SO much easier to serve than scoops of ice cream, and less trash than individually packaged cups) were served in the gorgeous and compostable Earthen Palm Leaf Bowls from Green Planet Parties.
Gift Opening
One thing I try hard to do (not always easy in the flurry of gift opening) is to take a photo of the gift-giver and the birthday child sitting together on the chair. It takes a minute to do, but I usually get a great photo of the two of them together, and I make copies of the picture to include with the thank you card. I've tried group photos, but it's hard to get all the kids to look "good" at the same time, whereas it is easier with just two kids at a time.
Aftermath
This marks the eighteenth party I've now thrown at home for my kids and their friends. Eighteenth, and my oldest is only eight! I'm getting better at reusing what I have on hand versus buying everything from scratch. I try to have a couple of "what if" activities in my back pocket but also try to have time for free play.
And, I'm not sure if I really save any money throwing my own parties, but I know the kids have great memories of their birthday parties and keep asking for them to be at home, so I guess that says something.
Most of the party took place in the dining room, so I concentrated my decorating to that room.
I covered the table in two light green cloth tablecloths from the Christmas Tree Shop. On top, I scattered some pink flowers we had left over from my oldest's luau party (from three years ago!), and threw some fake pink flowers in some vases (I would've preferred fresh, but I had the pink ones left over from one of the crafts).

Two long strands of Christmas lights hung across the windows; I found the lights at a drugstore in January for 75% off. In one corner was the large mylar balloon bundle that my sister sends the kids every year for their birthday. She always tries to tie them into my party plans, so there was plenty of girlie pink.
The food on this table was decidedly sweet: chocolate pretzel "wands", chocolate-covered strawberries and cookies.

Arrival
When the guests arrived, they were invited to the Family/TV room to choose a head piece. I was originally going to do these as a craft, but decided it was a bit too advanced for a few of the little girls and did them myself over a couple of nights. They were made of some dollar-store head bands, floral picks found in the wedding section of the craft store, green floral tape, some ribbon and a sparkly butterfly clip for each head piece. They were not hard to make, but just took a little time.

I had two boys at the party, and rather than make them wear flowers on their heads, I took some green felt, a stapler and a large feather and made them this elf hat. The ribbons were needed to keep the hat on their heads.

After getting their hats, the kids went into the kitchen to get a fairy tattoo. I had grabbed a couple of sheets that morning at Target for about $2 each. There were some snacks out on this table: fruit skewers, Tings and cheese stars (cut with a small cookie cutter that morning) and crackers (aka, the "healthy table").

Craft Time
Once the guests had arrived, they went into the dining room to make their craft: Fairy Houses. I had fallen in love with this idea after seeing it on the Simply Lovely blog. I cut little holes into Peat Pots for doors, and put out some tiny colored shells, feathers, strips of ribbon and moss (all from craft store), as well as some tiny pinecones and pine needles collected from our yard. Glue was poured into an egg carton that had been separated into individual holders, and they used a popsicle stick to apply. They did their craft on pink paper plates to make it easy to bring home and to also protect the table a bit from over-enthusiastic glue application.

Scavenger Hunt
After the craft, I assembled all the kids into the Living Room to explain the scavenger hunt which is a variation on the idea I saw at Great Fun 4 Kids (see attached Word document at bottom). I took a small gift that I had bought for Jilly and wrapped it about 11 times (enough so each guest could unwrap one layer). At each layer was a new clue that told them where to go to find another gift to take home. Holding their empty favor bags, the kids ran around the house to find the things that would become their favors: little bottles of bubbles, candy, plastic butterflies, gel pens, etc. They also got found their wings and wands (found here) which made them "official fairies".

As a goof, I looked up their "Fairy Names" printed them on stickers and read them outloud at the end of the hunt---the boys received ridiculous "Elf Names". The stickers went onto the favor bags so no one could lose their bag.
Cake Time
My oldest has a milk allergy, so I always make my own cakes and usually rely on cupcakes from my favorite cupcake book ever: Vegan Cupcakes Take Over the World. My inspiration for their "look" came from this photo. I purchased sugar flowers from Fancy Flours and, instead of Tinkerbell, grabbed one tiny fairy found at Target and stuck her to the top of the Cupcake Tower.

The cupcakes and Dibs ice cream (brilliant discovery because they are SO much easier to serve than scoops of ice cream, and less trash than individually packaged cups) were served in the gorgeous and compostable Earthen Palm Leaf Bowls from Green Planet Parties.
Gift Opening
One thing I try hard to do (not always easy in the flurry of gift opening) is to take a photo of the gift-giver and the birthday child sitting together on the chair. It takes a minute to do, but I usually get a great photo of the two of them together, and I make copies of the picture to include with the thank you card. I've tried group photos, but it's hard to get all the kids to look "good" at the same time, whereas it is easier with just two kids at a time.
Aftermath
This marks the eighteenth party I've now thrown at home for my kids and their friends. Eighteenth, and my oldest is only eight! I'm getting better at reusing what I have on hand versus buying everything from scratch. I try to have a couple of "what if" activities in my back pocket but also try to have time for free play.
And, I'm not sure if I really save any money throwing my own parties, but I know the kids have great memories of their birthday parties and keep asking for them to be at home, so I guess that says something.
Monday, March 2, 2009
Sylvania's PalPODzzz Make Bedtime a Little Brighter
Of all the things my kids do to avoid sleep, fighting over the nightlight makes me the most batty.
My oldest wants to turn on the bright nightlight that plugs into the wall, but the light shines directly into her sister's eyes .
My middle wants the one in the wall off, but the closet light on, door closed and then reopened a crack.
My son wants no light at all, and, by the way, he wants the clock unplugged (he thinks this is a nightlight, and it scares him that the time changes).
I've worked out compromises that involve moving large stuffed animals to block the light from hitting one child in the eyes but still allow the other to see its brightness. I've turned on the closet light until they fall to sleep and then go back in to shut it off before the light's buzzing wakes them up. I have given my son a sleep mask to wear at night, which is pretty hilarious to see.
So, when I was asked by Parent Bloggers Network if I'd like to try out Sylvania's new PalPODzzz portable nightlight, I was all over it.
I knew that this nightlight, which gives off a warm glow versus a harsh beam of light, could be the solution, especially since the base can be moved to be closest to the child who wants the most light.

My son, the flashlight hoarder of the household, was thrilled that the main unit can be removed from the base to become a kid-sized flashlight.
Of the two styles, rocket or ladybug, we chose rocket, mainly because I'm hoping to make our son an outer space-themed room should we ever get him out of his sisters' room.

After it arrived, I had to beat the children off with a stick* to let the unit perform its initial charge in the base. It also took me a day or two of negotiations to keep my son from sleeping with the removable rocket ship hugged to his body, but he finally understood that a rocket needs to return to its launching pad at bedtime. I will often find him "zooming" the flashlight rocket ship around the room, but he knows to put it back on its base before bedtime.

And, most importantly, the nightlight is no longer a source of stress at bedtime.
Someday, when we finally get around to cleaning out the playroom and making our son a bedroom, the rocket ship nightlight will go with him. I have already anticipated that this could cause my girls to fall back to their previous state of "nightlight anxiety" which is why I plan to grab a smiling ladybug to take the place of the rocket in their room. Hey, for under twenty bucks, I'm willing to buy a little peace at night.

*no children were really beaten with a stick during this initial charging period.
Subscribe to:
Posts (Atom)

